As predicted, I am tripping over tomato and basil plants while we wait for weather warm enough for planting. I am trying peanuts this year; my first attempts at starting them inside resulted in rotting seeds that smelled awful. I was advised to try again, with charcoal in the soil to lighten it up. I had a spot in the warmer part of the garden where I had burned before, so I tried some outside with wall-o-water cylinders to warm the soil. No news on that, yet.
The potatoes are in, the peas are up, and we've been eating greens from the garden. I also tried dandelions from the yard this year. They were good, parboiled for a few minutes and then sauteed with a little garlic. You just need to clean them very well because the stray blade of grass is like trying to chew dental floss. Rhubarb is up and very vigorous. I've been selling a lot to passersby and to the Covered Wagon Farm for pies. Rhubarb traffic is a constant interruption, but rhubarb lovers are such nice people that I don't mind.
There is one more bake sale, this Saturday, in front of the Leland Mercantile, for the Odyssey of the Mind teams that are going to world competition. They have managed to raise over $1o,000 in a about six weeks, though bake sales, car washes, a movie premier, large and small donations, and grants from the Leland Educational Foundation and the Oleson Foundation.
I will be baking again for this sale, but I have to go to work earlier and attend a noon meeting so my output will be less than the 20 loaves I baked last time. Maybe some Rhubarb Crumb Cake would be in order.
All this happens, but we still stop to admire the orioles, indigo buntings, and hummingbirds. And to hunt for morels. I never find any, but all that hunting gives me opportunity to note the locations of raspberries and gooseberries so I can go back later in the summer. I came home from work late one night and found a Cool Whip container of morels on my kitchen table. It seems the neighbor was weed whacking when he found the mother lode of morels on the site where the former neighbor cut down an apple tree 12 years ago. Not many people will share morels, but I have wonderful neighbors.

Twenty years in the old farmhouse on the corner, raising kids, growing gardens, keeping chickens. I am a mom, wife, neighbor, casino dealer, 4-H leader, township trustee. What does it mean to be "place literate"? Read on and see...
Showing posts with label baking. Show all posts
Showing posts with label baking. Show all posts
Thursday, May 22, 2008


Sunday, January 20, 2008
Food Section Fame
Headlining the Record Eagle food section generated much more excitement than I could have imagined. When I walked into the Poker Room on Wednesday, the regulars started bellowing "Where's the cookies!" which degenerated into "Cookies!" hollered so many times that I thought I was dealing poker on Sesame Street.
My husband was ice fishing on Lake Leelanau. There was only one other guy out there, but he walked a quarter mile over to Richard's hole to say "I saw your wife in the paper." My husbands was impressed that they printed one of my recipes next to one of Emeril's.
But the funniest was a former coworker, who stopped off at my blackjack table to tell me how much she loved my No Bake Cookie recipe.
She told me that she hit the kitchen as soon as she read the recipe, to make some cookies for her grandson: "But I saw that they had oatmeal in them, so I threw in some raisins." I had thought of putting raisins into No Bakes. It would be kind of like a Chunky bar.
Sandee had more to tell: "Then I thought that two cups of sugar was too much so I only used a cup and a half." Okay, I do that a lot, but I've never cut down the sugar in No Bakes. I've worried that the texture would be compromised, but Sandee was fearless.
"And the recipe called for a half cup of peanut butter, but I had 3/4 cup in the jar, so I used it all. Boy, those were great cookies! Thanks for printing the recipe!"
I had to laugh. "Well, I'm glad I got you into the kitchen!" Maybe I was trying to take some sort of credit for Sandee's cookies, but I think that cooking, like any form of communication, is only as good as the dialogue. I can't wait to find time to make Low Sugar High Peanut Butter No Bakes with Raisins.
My husband was ice fishing on Lake Leelanau. There was only one other guy out there, but he walked a quarter mile over to Richard's hole to say "I saw your wife in the paper." My husbands was impressed that they printed one of my recipes next to one of Emeril's.
But the funniest was a former coworker, who stopped off at my blackjack table to tell me how much she loved my No Bake Cookie recipe.
She told me that she hit the kitchen as soon as she read the recipe, to make some cookies for her grandson: "But I saw that they had oatmeal in them, so I threw in some raisins." I had thought of putting raisins into No Bakes. It would be kind of like a Chunky bar.
Sandee had more to tell: "Then I thought that two cups of sugar was too much so I only used a cup and a half." Okay, I do that a lot, but I've never cut down the sugar in No Bakes. I've worried that the texture would be compromised, but Sandee was fearless.
"And the recipe called for a half cup of peanut butter, but I had 3/4 cup in the jar, so I used it all. Boy, those were great cookies! Thanks for printing the recipe!"
I had to laugh. "Well, I'm glad I got you into the kitchen!" Maybe I was trying to take some sort of credit for Sandee's cookies, but I think that cooking, like any form of communication, is only as good as the dialogue. I can't wait to find time to make Low Sugar High Peanut Butter No Bakes with Raisins.
Monday, January 14, 2008
In the Record Eagle

If you asked me to name my unique skills, running a bake sale would be far down on the list. It's something that I would think that anyone could do, or that a lot of people could do better than me. Like my kids, for instance. The reporter somehow got the impression that I had coordinated bake sales for NHS and the physics club, but of course I did nothing of the sort. All I did was teach my girls to cook when they were in grade school, and to handle money, so that by high school they were competent to run bake sales, and much more, with my contribution limited to flour, butter, sugar, cocoa, and eggs.
But I was glad to share tips for running a bake sale, especially a bake sale with kids, because I think it's such a good experience for kids. I hate the "Mom, I need ten dollars!" syndrome and kids love to make their own money.
Wednesday, January 12, 2005
Bread in the Oven
The last steps of baking bread are to shape the loaves, let them rise a final time, bake, and eat.
When the dough has risen in the bowl about 45 minutes it will look like the classic description “doubled in bulk”. That 45 minute figure is a flexible, of course, but if you let it rise too long, the yeast will exhaust itself and your loaves won’t rise so well. In a hurry, I have started shaping loaves as soon as there was an observable rise and that works out OK, too.
Take the whole pile of dough and lay it out on a floured bowl. Flour your rolling pin and then roll the dough out flat, being sure to pop the air bubbles that turn up at the edges. You don’t need to roll it paper thin, but you need to eliminate those bubbles because they will end up as voids in the finished loaves. After the bubbles are gone, fold the whole thing in half, fold it in half again, then one more time into a wedge shape. Roll the dough up starting at the point, and then let it rest while you grease your pans.
This recipe fills four 5 by 8 inch bread pans or you can use three 5 by 8 and two 3 by 5 inch pans. Cut the lump of dough into fourths and then cut one of the fourths into two hunks of dough for the kiddy pans. If you are baking with kids, let them grease their pans and then let them take turns rolling out their dough and putting it in their pans. Kids will do what they do and be happy with the results; adults will want to take a more methodical approach.
Roll out one piece of dough at a time into an irregular rectangle, still looking to get rid of bubbles. Roll the rectangle up tightly from the narrow end, and then fold the ends of the roll under so that the cylinder you have left is the same length as the pan. Lay the loaf into the pan with the seams down and then shape your other loaves the same way.
I used to let my loaves rise on the counter under a damp dishtowel, but I found that the dishtowel often stuck to the dough, causing it to fall again before I got it into the oven. Now I set all four loves side by side on the middle oven rack and let them rise in the cold oven. If you have kneaded well, they will rise for quite a while. When you have more experience you can try for giant loaves. The first time just get wait until they have filled the sides of the pan and rounded an inch or two over the top of the pan. After about an hour, I check them and if they look nice and plump I turn the oven on to 350 degrees and set the timer for 40 minutes. (If they are going into a preheated oven they only need 35 minutes.)
Lately I have been using the timed cook feature on my oven to start the bread after I have left the house. This is only a good idea if there is going to be someone home at the end of the cook time to take the bread out of the pans, as it will sweat and turn mushy if it is left to cool in the pans. My teenagers love it when they are home alone and suddenly smell bread baking.
Bread is done when you turn it out of the pan and the bottom of the loaf looks golden and sounds a little hollow when you tap it with your knuckles. If you have an instant read probe thermometer the internal temp should be about 190 degrees.
Cut bread with a bread knife, that is a serrated knife. The serrations make the knife rip instead of crushing. Cooled bread is easier to cut, but everyone wants to eat fresh bread out of the oven, even if the loaves get mashed in the process.
When the bread has completely cooled, you can put it into plastic bags for storage.
If you make this bread recipe with all white flour it is very much like the bread that Grandma Bunny used to make. I have often wondered exactly why my grandmother gave me a book about baking bread instead of inviting me into her kitchen to show me. Grandpa was the vocal half of their marriage. Even though Grandma Bunny had been a central figure while I was growing up, after she died I found that I actually knew very little about her. She shunned cameras, so I had no photos. She had never told stories about her childhood or about herself at all. Even her hometown of Dewdrop, Pennsylvania had been flooded when the Kinzua Dam was built.
Grandpa Lee had earned an engineering degree at University of Michigan and launched a successful civil engineering firm. Until I was 5, he also ran a sand and gravel company from a pit about half a mile behind our house. He was legendary for the “silver tongued speeches” he used to persuade the townships of our county and the adjoining one to build a regional water system. He was also quite at home riding a construction crew. Unlike Bunny, Lee told everyone about his life and experiences and for his grandchildren it was usually to illustrate how little we knew and how easy our lives were in comparison to his.
I think now that Leon was frustrated that his wife didn’t “hop to” on his command the way the rest of the world did. Grandpa often argued with her about baking bread, saying that if you counted up the cost of the ingredients and the electricity to run the oven it would surely be cheaper to just buy bread. She didn’t argue with him, but she didn’t stop baking, either. Still, I recall that Grandpa’s opinion was that it was a waste of my time to learn to bake bread, that I should learn more important things. (This was in the late 1960’s, when it was still an oft repeated prediction that in the future people would not bother to cook and eat at all, but would get all of their nutrients from vitamins.) Grandma countered in her quiet way; I knew right away that she had carefully picked out the book she gave me and it did start me on a lifetime of baking bread.
The conversations with Grandpa when he was worrying about people knowing how to feed themselves came well after Bunny’s death. A much as he had criticized her during her life, he missed her terribly and spoke of her like a saint. Living alone, he had time to really appreciate what it takes to feed oneself. He baked beans over and over again but they never came out the way that Bunny used to make them. His curiosity about food extended to wondering about where it came from. At this time I was learning to keep bees. Grandpa, now in his eighties, was fascinated to hear how bees forage for nectar and pollinate crops. He asked over and over again how I would make the bees collect the sort of nectar that I wanted; it was a revelation to him that you couldn’t direct them, but you could simply take advantage of what they were going to do anyway.
These were the last conversations I had with Grandpa. I had moved to Hawaii when he started becoming sick and disoriented. Perhaps his personality change was the beginning of his decline, but that short interval of conversations made more of an impression on my than the years of lectures that came before.
When the dough has risen in the bowl about 45 minutes it will look like the classic description “doubled in bulk”. That 45 minute figure is a flexible, of course, but if you let it rise too long, the yeast will exhaust itself and your loaves won’t rise so well. In a hurry, I have started shaping loaves as soon as there was an observable rise and that works out OK, too.
Take the whole pile of dough and lay it out on a floured bowl. Flour your rolling pin and then roll the dough out flat, being sure to pop the air bubbles that turn up at the edges. You don’t need to roll it paper thin, but you need to eliminate those bubbles because they will end up as voids in the finished loaves. After the bubbles are gone, fold the whole thing in half, fold it in half again, then one more time into a wedge shape. Roll the dough up starting at the point, and then let it rest while you grease your pans.
This recipe fills four 5 by 8 inch bread pans or you can use three 5 by 8 and two 3 by 5 inch pans. Cut the lump of dough into fourths and then cut one of the fourths into two hunks of dough for the kiddy pans. If you are baking with kids, let them grease their pans and then let them take turns rolling out their dough and putting it in their pans. Kids will do what they do and be happy with the results; adults will want to take a more methodical approach.
Roll out one piece of dough at a time into an irregular rectangle, still looking to get rid of bubbles. Roll the rectangle up tightly from the narrow end, and then fold the ends of the roll under so that the cylinder you have left is the same length as the pan. Lay the loaf into the pan with the seams down and then shape your other loaves the same way.
I used to let my loaves rise on the counter under a damp dishtowel, but I found that the dishtowel often stuck to the dough, causing it to fall again before I got it into the oven. Now I set all four loves side by side on the middle oven rack and let them rise in the cold oven. If you have kneaded well, they will rise for quite a while. When you have more experience you can try for giant loaves. The first time just get wait until they have filled the sides of the pan and rounded an inch or two over the top of the pan. After about an hour, I check them and if they look nice and plump I turn the oven on to 350 degrees and set the timer for 40 minutes. (If they are going into a preheated oven they only need 35 minutes.)
Lately I have been using the timed cook feature on my oven to start the bread after I have left the house. This is only a good idea if there is going to be someone home at the end of the cook time to take the bread out of the pans, as it will sweat and turn mushy if it is left to cool in the pans. My teenagers love it when they are home alone and suddenly smell bread baking.
Bread is done when you turn it out of the pan and the bottom of the loaf looks golden and sounds a little hollow when you tap it with your knuckles. If you have an instant read probe thermometer the internal temp should be about 190 degrees.
Cut bread with a bread knife, that is a serrated knife. The serrations make the knife rip instead of crushing. Cooled bread is easier to cut, but everyone wants to eat fresh bread out of the oven, even if the loaves get mashed in the process.
When the bread has completely cooled, you can put it into plastic bags for storage.
If you make this bread recipe with all white flour it is very much like the bread that Grandma Bunny used to make. I have often wondered exactly why my grandmother gave me a book about baking bread instead of inviting me into her kitchen to show me. Grandpa was the vocal half of their marriage. Even though Grandma Bunny had been a central figure while I was growing up, after she died I found that I actually knew very little about her. She shunned cameras, so I had no photos. She had never told stories about her childhood or about herself at all. Even her hometown of Dewdrop, Pennsylvania had been flooded when the Kinzua Dam was built.
Grandpa Lee had earned an engineering degree at University of Michigan and launched a successful civil engineering firm. Until I was 5, he also ran a sand and gravel company from a pit about half a mile behind our house. He was legendary for the “silver tongued speeches” he used to persuade the townships of our county and the adjoining one to build a regional water system. He was also quite at home riding a construction crew. Unlike Bunny, Lee told everyone about his life and experiences and for his grandchildren it was usually to illustrate how little we knew and how easy our lives were in comparison to his.
I think now that Leon was frustrated that his wife didn’t “hop to” on his command the way the rest of the world did. Grandpa often argued with her about baking bread, saying that if you counted up the cost of the ingredients and the electricity to run the oven it would surely be cheaper to just buy bread. She didn’t argue with him, but she didn’t stop baking, either. Still, I recall that Grandpa’s opinion was that it was a waste of my time to learn to bake bread, that I should learn more important things. (This was in the late 1960’s, when it was still an oft repeated prediction that in the future people would not bother to cook and eat at all, but would get all of their nutrients from vitamins.) Grandma countered in her quiet way; I knew right away that she had carefully picked out the book she gave me and it did start me on a lifetime of baking bread.
The conversations with Grandpa when he was worrying about people knowing how to feed themselves came well after Bunny’s death. A much as he had criticized her during her life, he missed her terribly and spoke of her like a saint. Living alone, he had time to really appreciate what it takes to feed oneself. He baked beans over and over again but they never came out the way that Bunny used to make them. His curiosity about food extended to wondering about where it came from. At this time I was learning to keep bees. Grandpa, now in his eighties, was fascinated to hear how bees forage for nectar and pollinate crops. He asked over and over again how I would make the bees collect the sort of nectar that I wanted; it was a revelation to him that you couldn’t direct them, but you could simply take advantage of what they were going to do anyway.
These were the last conversations I had with Grandpa. I had moved to Hawaii when he started becoming sick and disoriented. Perhaps his personality change was the beginning of his decline, but that short interval of conversations made more of an impression on my than the years of lectures that came before.
Friday, January 07, 2005
Kneading
When I was growing up my Grandma Bunny (my dad’s mom) baked bread every week in large quantities. My dad worked in the family business and he would come home once a week with a brown bag filled with six or eight loaves of bread, some home made jams and canned tomatoes, or maybe a casserole of baked beans. We had bread in the freezer and more bread in the bread drawer.
Although my grandparents lived in the city of Lockport, New York, Grandma Bunny had grown up in rural Pennsylvania. Grandma remained very much a country housewife, shopping the farmer’s markets and canning large amounts of tomatoes, peaches, jams, and jellies. Like everyone, my grandparents had struggled during the Depression. Grandpa Lee talked more about the Depression years towards the end of his life, around 1980, as he saw the US national debt rise to what was then an historic high. He worried that the economy would crash again, only this time people would suffer more because they didn’t have the practical skills in raising food and livestock that his generation had grown up with. “Even in the city,” he told me, “people knew how to feed themselves. Even in downtown apartments you saw people with chickens and goats on their fire escapes.” Those conversations have resonated through my life and I have made it a game to see how much I could “feed myself” instead of shopping at the supermarket.
When I was about fifteen, I asked Grandma Bunny to teach me how to bake bread. Curiously, she refused to teach me herself, but she did give me my first cookbook on the subject, Bake Your Own Bread, by Floss and Stan Dworkin. It was a good book with lots of recipes, a thorough description of techniques, and science and dietary advice that was ahead of its time. Even so, I found it hard to successfully navigate the passage between batter and dough. Either I was up to my elbows in sticky dough or I was arm wrestling with a stiff dough that was destined to rise no higher than a doorstop.
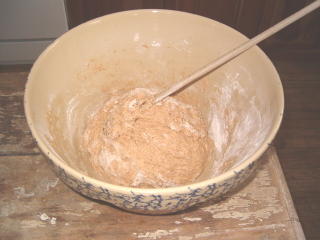
You can probably figure out that the cause of the first condition is too much liquid and the cause of the second condition is too much flour. So why don’t recipes just tell you exactly how much flour to use? Because they can’t. If your flour is older, it will absorb more liquid. If the weather is humid, it will absorb less. How you store your flour, whether you shake the cup as you measure, it all makes the process too unpredictable. Although it is initially hard to master, once you have experience turning a wet batter into kneadable dough is a skill that you never lose.
We have already seen several tricks of the trade:
• That glop of shortening that we added to the batter will help make the bread fine grained and tender, but it will also make the dough less likely to stick to your hands. If you need to cut out all fat, you can eliminate the shortening, after you get a little experience with baking.
• Use bread flour for at least some of the flour. A cup of semolina flour (also called pasta flour) used as part of the 3 cups of flour in the batter will help make the dough kneadable.
• Take your time while adding flour to give it time to absorb the liquid. If you have small children around you have guaranteed interruptions. If not, take a break to put laundry in the dryer or check your email.
I usually use about 4-5 cups total whole wheat flour and then switch to white flour. The white flour absorbs less liquid so I am less apt to use too much. Stirring thoroughly after each cup of flour, I find that as the dough gets stiffer I am stirring less and folding more. With a strong wooden spoon I can turn the dough in the bowl and fold it over on itself, sort of like kneading without getting my hands into it yet. Already there are drier looking bits of dough on the sides of the bowl; I scrape these down and into the wetter center of the dough. Eventually I am mostly just turning the dough over on itself and only occasionally adding flour. This is a good time to take one more short break and let the dough get used to itself again.
A word about work surfaces. To do this work comfortably you need to set your bowl on a surface that is a tad lower than hip height. Unless you are very tall, this will mean your kitchen table, not the kitchen counter. My kitchen table is ridiculously rustic, so I push the tablecloth back and lay down a dishtowel to keep the bowl from sliding. I have an 18in by 24 in piece of Corian that I lay over the dishtowel to finish kneading on. If I had a regular Formica tabletop I would just knead on the table.
When I come back to the dough after 5 or 10 minutes it is ready for hands-on kneading. Whether I knead on the table or in the bowl, the action is the same: flatten the dough with the heels of my hands, then fold it over on itself, turn it a little, then flatten, fold and turn again. At first I need to keep putting flour on my hand to keep the dough from sticking, later it gets to be moist, not sticky so my bare hands are fine.
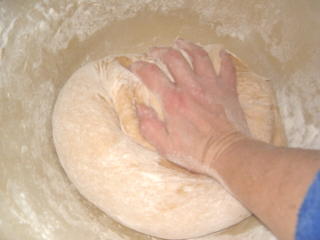
It is impossible to hand knead standard bread dough too long. I usually look at the clock once the dough stops sticking and then try to keep up a good rhythm for 5 or ten minutes. Time spent kneading is very much like time spent in deep thinking. You stretch thoughts and fold them over on themselves until myriad elements take on a new identity of their own. If I am pressed for time I will knead for less time, but I know I’m gambling. Kneading develops the gluten that will make the loaves rise with strength; insufficient kneading makes loaves that tend to fall if you sneeze at them.
After kneading it is time to let the dough rise. If I am kneading on the table, I just invert the bowl over the dough and leave it alone. If I am kneading in the bowl, I leave it in the bowl, but cover the bowl with my Corian board or a cookie sheet to keep the dough from drying out.
Although my grandparents lived in the city of Lockport, New York, Grandma Bunny had grown up in rural Pennsylvania. Grandma remained very much a country housewife, shopping the farmer’s markets and canning large amounts of tomatoes, peaches, jams, and jellies. Like everyone, my grandparents had struggled during the Depression. Grandpa Lee talked more about the Depression years towards the end of his life, around 1980, as he saw the US national debt rise to what was then an historic high. He worried that the economy would crash again, only this time people would suffer more because they didn’t have the practical skills in raising food and livestock that his generation had grown up with. “Even in the city,” he told me, “people knew how to feed themselves. Even in downtown apartments you saw people with chickens and goats on their fire escapes.” Those conversations have resonated through my life and I have made it a game to see how much I could “feed myself” instead of shopping at the supermarket.
When I was about fifteen, I asked Grandma Bunny to teach me how to bake bread. Curiously, she refused to teach me herself, but she did give me my first cookbook on the subject, Bake Your Own Bread, by Floss and Stan Dworkin. It was a good book with lots of recipes, a thorough description of techniques, and science and dietary advice that was ahead of its time. Even so, I found it hard to successfully navigate the passage between batter and dough. Either I was up to my elbows in sticky dough or I was arm wrestling with a stiff dough that was destined to rise no higher than a doorstop.
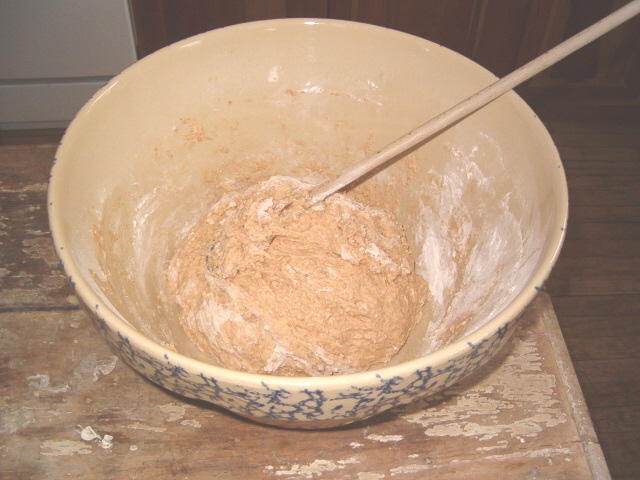
You can probably figure out that the cause of the first condition is too much liquid and the cause of the second condition is too much flour. So why don’t recipes just tell you exactly how much flour to use? Because they can’t. If your flour is older, it will absorb more liquid. If the weather is humid, it will absorb less. How you store your flour, whether you shake the cup as you measure, it all makes the process too unpredictable. Although it is initially hard to master, once you have experience turning a wet batter into kneadable dough is a skill that you never lose.
We have already seen several tricks of the trade:
• That glop of shortening that we added to the batter will help make the bread fine grained and tender, but it will also make the dough less likely to stick to your hands. If you need to cut out all fat, you can eliminate the shortening, after you get a little experience with baking.
• Use bread flour for at least some of the flour. A cup of semolina flour (also called pasta flour) used as part of the 3 cups of flour in the batter will help make the dough kneadable.
• Take your time while adding flour to give it time to absorb the liquid. If you have small children around you have guaranteed interruptions. If not, take a break to put laundry in the dryer or check your email.
I usually use about 4-5 cups total whole wheat flour and then switch to white flour. The white flour absorbs less liquid so I am less apt to use too much. Stirring thoroughly after each cup of flour, I find that as the dough gets stiffer I am stirring less and folding more. With a strong wooden spoon I can turn the dough in the bowl and fold it over on itself, sort of like kneading without getting my hands into it yet. Already there are drier looking bits of dough on the sides of the bowl; I scrape these down and into the wetter center of the dough. Eventually I am mostly just turning the dough over on itself and only occasionally adding flour. This is a good time to take one more short break and let the dough get used to itself again.
A word about work surfaces. To do this work comfortably you need to set your bowl on a surface that is a tad lower than hip height. Unless you are very tall, this will mean your kitchen table, not the kitchen counter. My kitchen table is ridiculously rustic, so I push the tablecloth back and lay down a dishtowel to keep the bowl from sliding. I have an 18in by 24 in piece of Corian that I lay over the dishtowel to finish kneading on. If I had a regular Formica tabletop I would just knead on the table.
When I come back to the dough after 5 or 10 minutes it is ready for hands-on kneading. Whether I knead on the table or in the bowl, the action is the same: flatten the dough with the heels of my hands, then fold it over on itself, turn it a little, then flatten, fold and turn again. At first I need to keep putting flour on my hand to keep the dough from sticking, later it gets to be moist, not sticky so my bare hands are fine.
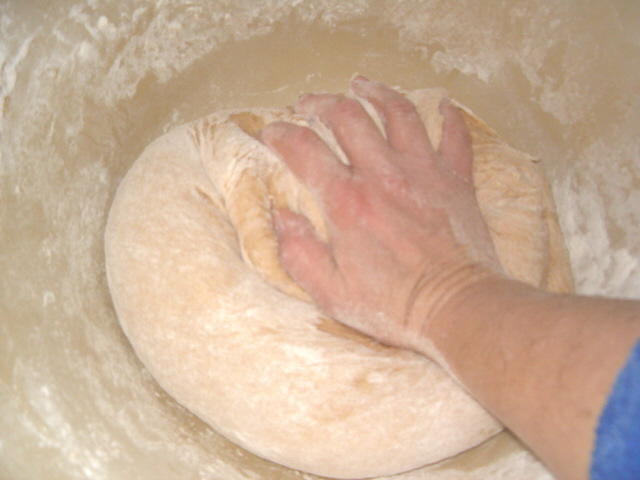
It is impossible to hand knead standard bread dough too long. I usually look at the clock once the dough stops sticking and then try to keep up a good rhythm for 5 or ten minutes. Time spent kneading is very much like time spent in deep thinking. You stretch thoughts and fold them over on themselves until myriad elements take on a new identity of their own. If I am pressed for time I will knead for less time, but I know I’m gambling. Kneading develops the gluten that will make the loaves rise with strength; insufficient kneading makes loaves that tend to fall if you sneeze at them.
After kneading it is time to let the dough rise. If I am kneading on the table, I just invert the bowl over the dough and leave it alone. If I am kneading in the bowl, I leave it in the bowl, but cover the bowl with my Corian board or a cookie sheet to keep the dough from drying out.
Tuesday, December 28, 2004
Bread Baking Equipment
There is a danger here of making things sound unnecessarily complicated. You don’t have to go out and buy a whole new kitchen to bake a loaf of bread, but when you are going to be doing a job over and over again for years to come, you might want to work towards collecting the sort of equipment that makes the job less frustrating and more rewarding.
A word about time. Yes, it takes time to make bread, but mixing and kneading and rising can be done in small chunks interspersed with other chores, like laundry or caring for small kids. In fact the bread turns out better when you are not worrying it or rushing it along. You will also find that the yeast has something of its own schedule. On hot days your dough will rise fast, but on cooler days you can choose to be more leisurely.
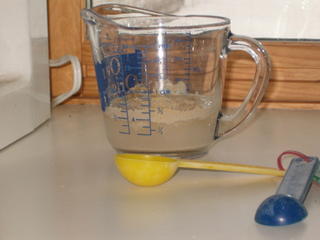
This is my first favorite piece of equipment: a 2 cup clear Pyrex measuring cup. I sprinkle the 2 tablespoons of yeast on top of the ½ cup warm water and I am waiting for the yeast to dissolve. Today it is winter and our house thermostat is set at 62 degrees, so this mixture looked very much the same for almost two hours.
I let it look the same because my daughter wanted to go pick up a friend to play with and it took longer than expected because of slushy roads. Once I got home I added a pinch of sugar and set it over the warmer part of the gas stove make it foam a bit.
Old time recipes call for “proving” yeast like this every time you bake. Modern recipes skip this step, but I find it useful as I still on rare occasions find that my yeast is not as robust as I would like. Today I was reminded that it is indeed cold in this house and I will adjust my baking techniques accordingly.
A word about time. Yes, it takes time to make bread, but mixing and kneading and rising can be done in small chunks interspersed with other chores, like laundry or caring for small kids. In fact the bread turns out better when you are not worrying it or rushing it along. You will also find that the yeast has something of its own schedule. On hot days your dough will rise fast, but on cooler days you can choose to be more leisurely.
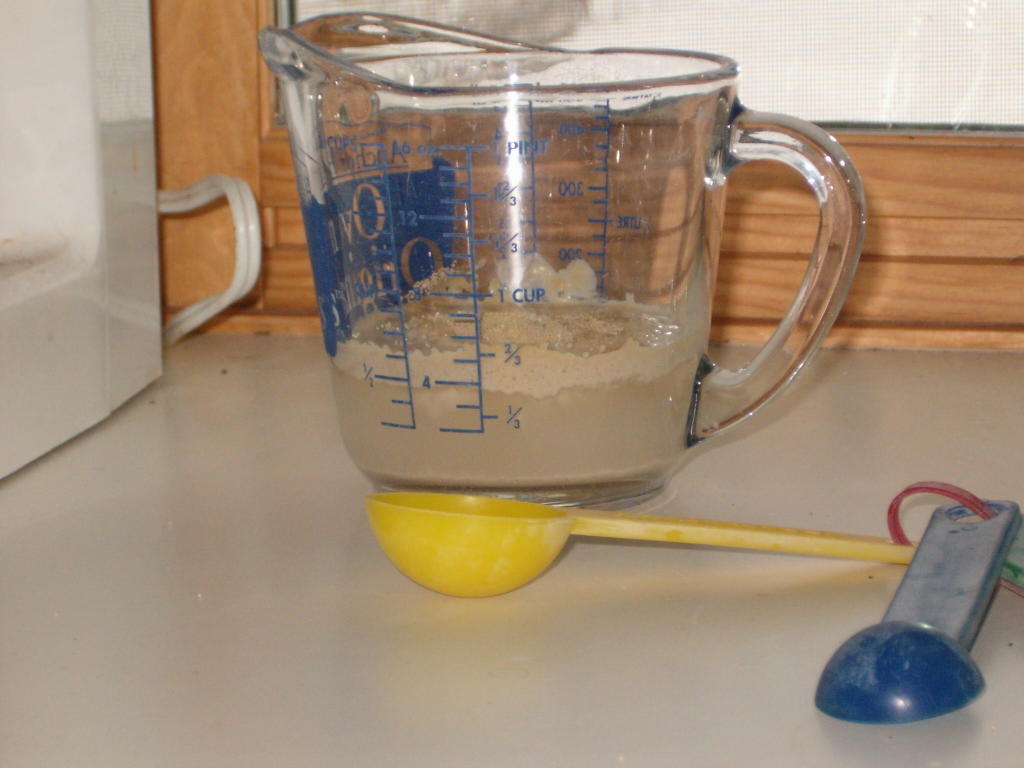
This is my first favorite piece of equipment: a 2 cup clear Pyrex measuring cup. I sprinkle the 2 tablespoons of yeast on top of the ½ cup warm water and I am waiting for the yeast to dissolve. Today it is winter and our house thermostat is set at 62 degrees, so this mixture looked very much the same for almost two hours.
I let it look the same because my daughter wanted to go pick up a friend to play with and it took longer than expected because of slushy roads. Once I got home I added a pinch of sugar and set it over the warmer part of the gas stove make it foam a bit.
Old time recipes call for “proving” yeast like this every time you bake. Modern recipes skip this step, but I find it useful as I still on rare occasions find that my yeast is not as robust as I would like. Today I was reminded that it is indeed cold in this house and I will adjust my baking techniques accordingly.
Monday, December 27, 2004
Baking Bread
Baking Bread
It is hard to get started writing about my household. The garden exists because of the chickens. The chickens are here to lay eggs. Selling eggs leads to selling rhubarb. What we eat is what the garden gave us. Each day offers chores according to the season, as well as gifts. One thing I do at least once a week is make bread. It is always the same recipe, but the job and the bread differ with time of year.
With five people in the family, I make four loaves at a time. The recipe is simple:
2 tablespoons dry yeast dissolved in ½ cup warm water
3 cups warm water
¼ cup shortening
1 tablespoon salt
½ cup sugar
1 to 4 eggs (optional)
Flour
Dissolve yeast in water.
Combine yeast, water, sugar, salt, shortening, and eggs. Add 3 cups of flour, then stir 200 times without reversing direction. Let sit 20 minutes.
Add flour one cup at a time until dough is kneadable. Do this slowly; the flour needs time to absorb water and if you add too much your bread will be dry. Knead the bread for 10 minutes, and then let it rise for an hour.
Shape the dough into four loaves and let rise until they are large. Bake at 350 degrees for 35 minutes. Test one loaf with a probe-type thermometer; done is 190 degrees in the middle of a loaf that was in the middle of the oven. Turn out of the pans to cool.
My standard flour is a combination of whole wheat bread flour and white flour. I use 3 or 4 cups of whole wheat to start the recipe and white flour to finish. (My usual plot is to use as much whole grain flour as my family will eat without thinking that I am serving them “health food’.) Substituting one cup of semolina flour in the beginning makes the dough easier to knead.
Stone-Ground Whole Wheat Bread Flour from Great River Milling is a nice choice(http://www.greatrivermilling.com/). Semolina flour can be found at Bob’s Red Mill: (http://www.bobsredmill.com/).
Tomorrow I will talk about the my bread baking equipment.
It is hard to get started writing about my household. The garden exists because of the chickens. The chickens are here to lay eggs. Selling eggs leads to selling rhubarb. What we eat is what the garden gave us. Each day offers chores according to the season, as well as gifts. One thing I do at least once a week is make bread. It is always the same recipe, but the job and the bread differ with time of year.
With five people in the family, I make four loaves at a time. The recipe is simple:
2 tablespoons dry yeast dissolved in ½ cup warm water
3 cups warm water
¼ cup shortening
1 tablespoon salt
½ cup sugar
1 to 4 eggs (optional)
Flour
Dissolve yeast in water.
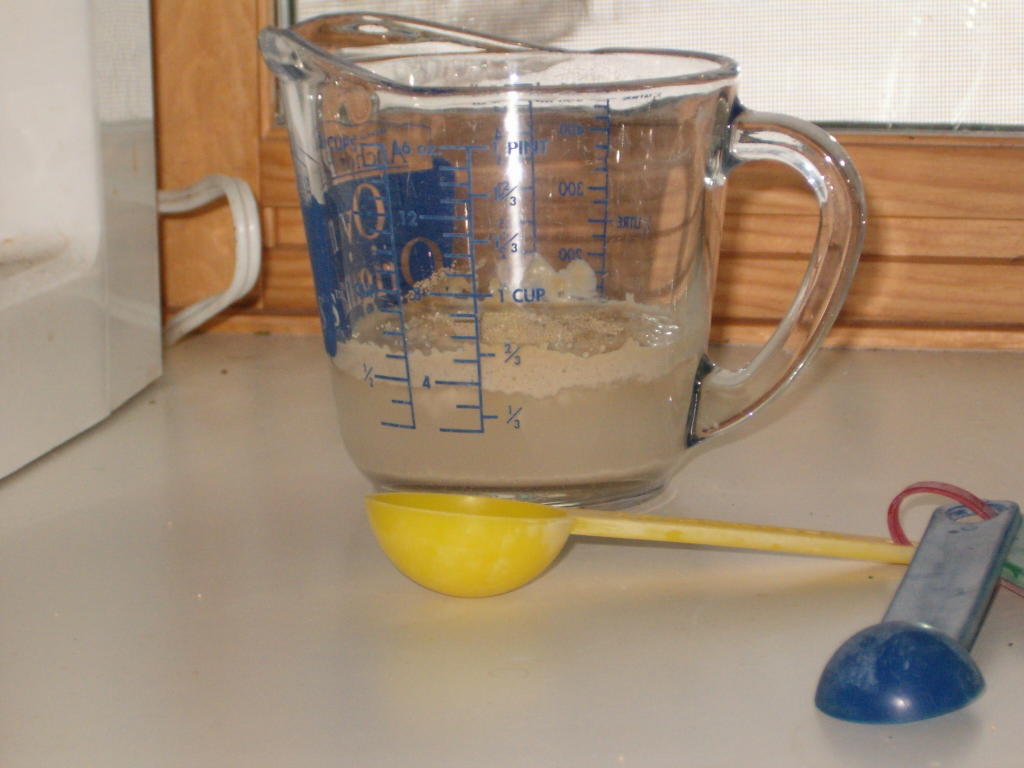
Combine yeast, water, sugar, salt, shortening, and eggs. Add 3 cups of flour, then stir 200 times without reversing direction. Let sit 20 minutes.
Add flour one cup at a time until dough is kneadable. Do this slowly; the flour needs time to absorb water and if you add too much your bread will be dry. Knead the bread for 10 minutes, and then let it rise for an hour.
Shape the dough into four loaves and let rise until they are large. Bake at 350 degrees for 35 minutes. Test one loaf with a probe-type thermometer; done is 190 degrees in the middle of a loaf that was in the middle of the oven. Turn out of the pans to cool.
My standard flour is a combination of whole wheat bread flour and white flour. I use 3 or 4 cups of whole wheat to start the recipe and white flour to finish. (My usual plot is to use as much whole grain flour as my family will eat without thinking that I am serving them “health food’.) Substituting one cup of semolina flour in the beginning makes the dough easier to knead.
Stone-Ground Whole Wheat Bread Flour from Great River Milling is a nice choice(http://www.greatrivermilling.com/). Semolina flour can be found at Bob’s Red Mill: (http://www.bobsredmill.com/).
Tomorrow I will talk about the my bread baking equipment.
Subscribe to:
Posts (Atom)